

Price :
QTY :
CART TOTALS :
There are items
in your cart
CART TOTALS :
Your shopping bag is empty
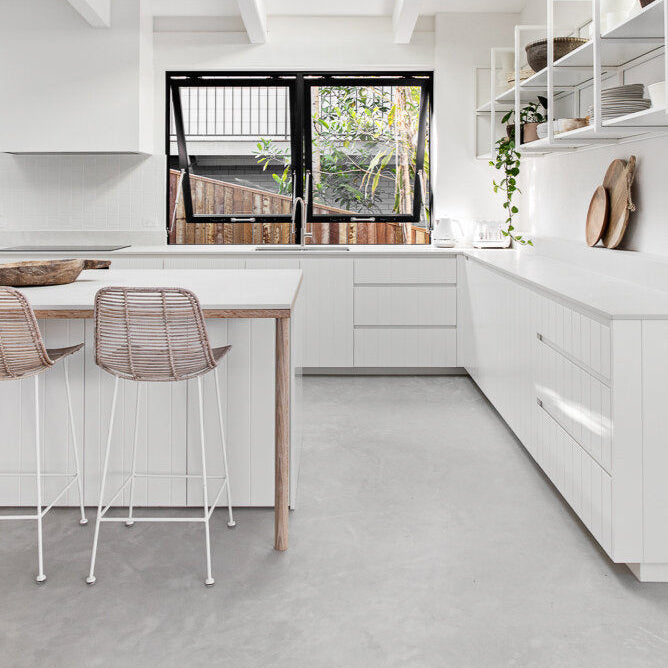
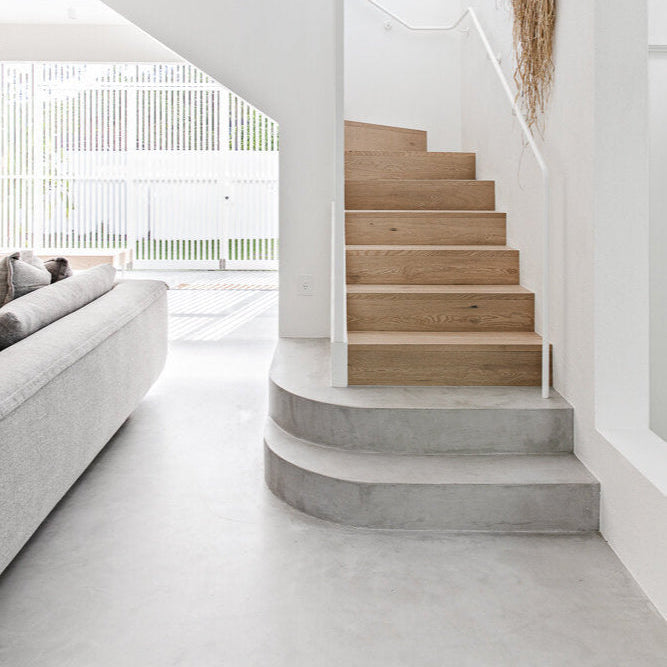
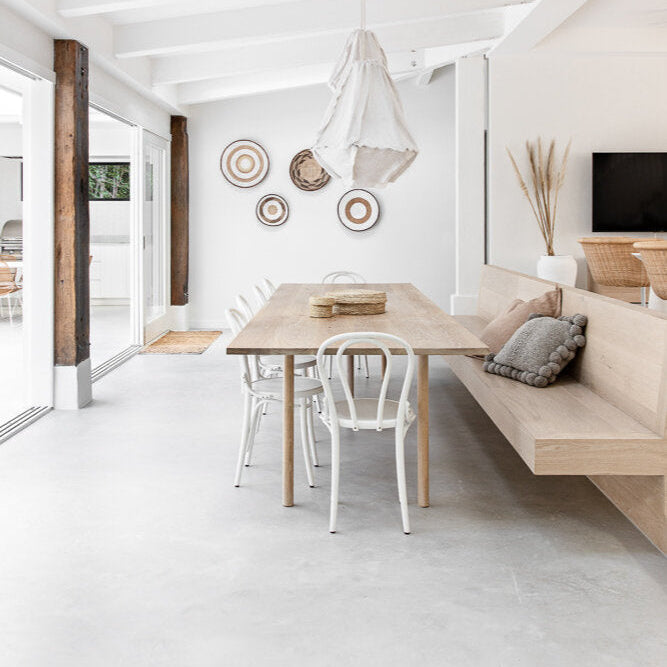
Go to the shopThis guide covers the application of Ecoflor® Micro Concrete directly over existing tiled surfaces — floors and walls — including wet areas. The tile covering system uses Blocca Rete and fibreglass mesh to create a sound bonding base before the cement coats are applied.
Practice first. Before tackling your tiled surface, run through your technique on a piece of cement sheet. Tiled surfaces have specific requirements — follow this guide carefully for a professional result.
System overview
Base coat options
One coat of 600 Cement over the primed mesh. Faster and uses fewer materials. Recommended when time is a consideration.
Two coats of 300 Cement over the primed mesh. Builds sufficient thickness to fully cover the mesh shadow for a cleaner result.
What you'll need
Application steps
Clean the tiles thoroughly
The tiles must be completely clean before any primer is applied. Remove all traces of soap scum, grease, mould, and surface contaminants using a suitable detergent. Rinse well and allow to dry completely.
Optional — fill grout lines: Prime grout lines with Concrete Modifier, then apply Micro Cement paste to fill them. Allow to dry 1–2 hours, then sand the entire surface with 80-grit paper and vacuum thoroughly.
Mask adjacent structures
Remove internal doors where applicable. Apply 50mm painter's tape along skirting, door frames, and adjacent flooring. Reinforce with 50mm cloth tape over the painter's tape. Protect all adjacent horizontal surfaces.
Prime — Blocca Rete (first coat)
Apply the first coat of Blocca Rete over the cleaned tile surface using a brush or roller. Ensure even, full coverage.
Allow to dry — approximately 3 hours.
Apply fibreglass mesh
While the first coat of Blocca Rete is still tacky, or immediately after drying, apply adhesive-backed fibreglass mesh over the entire surface. Ensure full coverage with no gaps. Butt mesh edges together — do not overlap.
The fibreglass mesh is critical for tile covering applications — it bridges grout lines and prevents reflective cracking in the finished surface.
Prime — Blocca Rete (second coat)
Apply a second coat of Blocca Rete over the fibreglass mesh to lock it into place. Ensure the mesh is fully embedded and covered.
Allow to dry overnight before applying the base coat.
Base coat — 600 Cement (Option A) or 300 Cement × 2 (Option B)
Choose one of the two base coat options. Both achieve the same goal — sufficient build to cover the mesh shadow before applying Micro Cement.
Option A: 600 Cement — 1 coat
Coverage: approximately 1.3m² per kg on floors / 1.0m² per kg on walls.
Option B: 300 Cement — 2 coats
Coverage: approximately 1.6m² per kg on floors / 1.0m² per kg on walls per coat. Sand and re-prime with Concrete Modifier (diluted 20–30%) between the two coats. Allow 60 minutes drying time before applying the second coat.
Mixing ratios (both options)
| Ingredient | Floors (per 15KG) | Walls (per 15KG) | Walls (per 1KG) |
|---|---|---|---|
| Clean water | 2 litres | 1.6 litres | ~105ml |
| Concrete Modifier | 2 litres | 1.6 litres | ~105ml |
| Liquid Colour Pigment | 200ml | 200ml | proportional |
Mixing method (both options): Combine Concrete Modifier and water 1:1. Add the full 200ml colour pigment container to the entire liquid batch and stir until evenly combined. Then measure out the required volume of coloured liquid proportionate to the amount of cement powder you are mixing — e.g. 630ml per 3KG of 600 or 300 Cement. Gradually add the cement powder while mixing continuously. Blend for 2–3 minutes until creamy and flowing.
Only mix what you can apply within 30 minutes.
Application: Apply by trowel ensuring full, even coverage. Avoid build-up at edges and corners.
Allow each coat to dry — approximately 6–8 hours.
Important: Do not add liquid to rehydrate a stiffening mix — this will alter the colour. Remix with the paddle stirrer to soften it.
Sand and re-prime before finish coat
Sand the dried base coat with 80–100 grit sandpaper using an orbital sander with dust extraction. Vacuum all dust thoroughly.
Apply Ecoflor® Concrete Modifier diluted 20–30% in clean water. Allow to dry — approximately 60 minutes — before applying Micro Cement.
Finish coat — Micro Cement
Ecoflor® Micro Cement produces an ultra-smooth, polishable finish. Coverage: approximately 3m² per kg for both floors and walls when applied over 300 Cement.
Only mix what you can apply within 30 minutes.
| Ingredient | Floors (per 10KG) | Walls (per 10KG) |
|---|---|---|
| Clean water | 1.9 litres | 1.6 litres |
| Concrete Modifier | 1.9 litres | 1.6 litres |
| Liquid Colour Pigment | 200ml | 200ml |
Apply a thin coat by trowel ensuring full coverage. Keep the surface as smooth as possible and avoid build-up at edges and corners.
Colour mixing tip: Add the full 200ml pigment container to the entire liquid batch and stir until evenly combined. Then measure out the required volume of coloured liquid proportionate to the cement powder being mixed — e.g. 640ml per 2KG of Micro Cement on floors, or 640ml per 2KG on walls.
Allow to dry — approximately 4–6 hours.
Important: Do not add liquid to rehydrate a stiffening mix — this will alter the colour. Remix with the paddle stirrer to soften it.
Sand before sealing
Remove all masking tape. Use a steel spatula to knock down any dry cement build-up at edges and corners.
Sand the surface with 100–120 grit sandpaper. Vacuum all dust thoroughly before sealing.
Seal
Sealing is essential for durability and stain resistance. Apply sealer no earlier than 8 hours after completing the Micro Cement coat.
Floors:
Walls:
For wet areas or floors requiring slip resistance, add EcoGrip to the final coat of Ecostar 2K. Use flexible caulking at internal corners after sealing is complete.
Allow full cure of 7 days before normal use.
Ready to get started? Our tile covering kits include everything you need for spaces from 15m² to 30m².
Shop tile kits Get expert advice