

Price :
QTY :
CART TOTALS :
There are items
in your cart
CART TOTALS :
Your shopping bag is empty
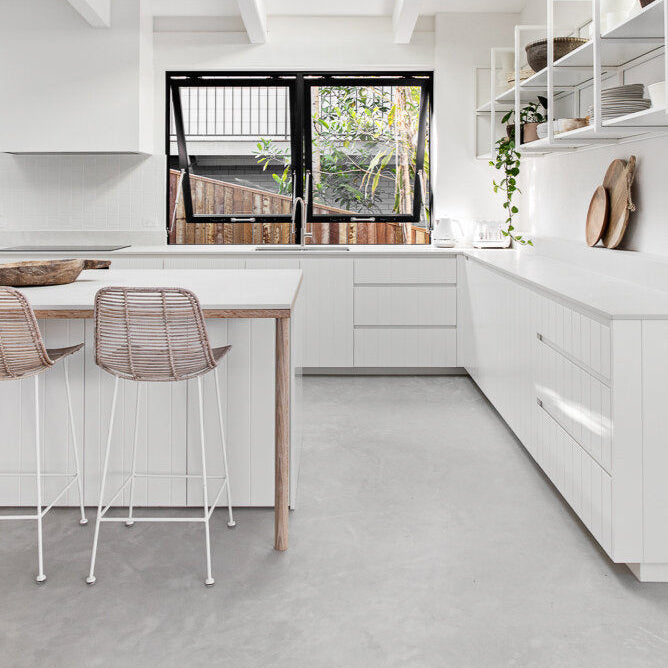
Go to the shopThis guide covers the full application of Ecoflor® Micro Concrete on floor surfaces — from substrate preparation through to sealing. Whether you're a tradie or a confident DIYer, follow each step carefully for a professional result.
Practice first. Before tackling your floor, run through your technique on a piece of cement sheet. Get comfortable with the mix consistency and trowel method — it makes a real difference on the day.
System overview
What you'll need
Application steps
Surface preparation
All surfaces must be structurally sound, clean, dry, and free from dust, oil, moisture, and contaminants. Remove any paint, wax, sealers, curing compounds, or adhesives that could compromise adhesion.
Indoor concrete must be mechanically profiled to achieve CSP #2–#3. For external concrete, acid etching followed by high-pressure washing is suitable.
Ecoflor® Micro Concrete can be applied over concrete, FC sheet, chipboard, and tiles. Each substrate has specific preparation requirements — contact Ecoflor® on 1300 326 356 for substrate-specific advice.
Mask adjacent structures
Remove internal doors if applicable. Apply 50mm painter's masking tape along all adjacent vertical surfaces — architraves, skirting boards, kitchen joinery, and slide door rails — and horizontally on adjacent flooring.
Follow with 50mm cloth tape (high strength) directly over the painter's tape. Cover and protect all other horizontal surfaces.
Prime — Concrete Modifier
Mix Ecoflor® Concrete Modifier with 20–30% clean water. Apply to the prepared surface using a broom or roller in a circular motion, ensuring full coverage. Do not allow to pool.
Allow to dry thoroughly — approximately 60 minutes — before proceeding.
Base coat — 600 Cement
Ecoflor® 600 Cement with coarse aggregate creates a tough, durable base coat. Coverage: approximately 1.3m² per kg at 0.6mm thickness — up to 20m² per 15KG bucket.
Only mix what you can apply within 30 minutes. Reduce this time on warmer days.
| Ingredient | Amount (per 15KG bucket) | Small batch (per 1KG) |
|---|---|---|
| Clean water | 2 litres | ~140ml |
| Concrete Modifier | 2 litres | ~140ml |
| Liquid Colour Pigment | 200ml (1 container) | proportional |
| 600 Cement powder | 15KG | 1KG |
Mixing method: Combine Concrete Modifier and water 1:1. Add the full 200ml colour pigment container to the entire liquid batch and stir until evenly combined. Then measure out the required volume of coloured liquid proportionate to the amount of cement powder you are mixing. For example: 840ml of coloured liquid per 3KG of 600 Cement. Gradually add the cement powder while mixing continuously with a high-torque drill and metal high shear paddle stirrer. Blend for 2–3 minutes until a creamy, flowing consistency is achieved. Scrape the sides of the bucket to remove unmixed powder.
Application: Apply to the floor using trowels, ensuring complete and uniform coverage. Use a random trowel pattern — avoid radial motions as trowel marks may remain visible. Prevent build-up at edges and internal corners.
Allow to dry — approximately 6–8 hours.
Important: Do not add liquid to rehydrate a stiffening mix — this will alter the colour. If the mix is setting in the bucket, remix with the paddle stirrer to soften it.
Sand and re-prime between coats
Using a floor sander or scrubbing machine with sanding screen attachment and dust extraction, sand over the entire dried base coat with 80–100 grit sandpaper to remove knobs and surface imperfections. Use hand tools along edges and corners.
Vacuum all dust thoroughly, then re-prime with Concrete Modifier diluted 20–30% in clean water. Allow to dry — approximately 60 minutes — before applying the next coat.
Second coat — 300 Cement
Ecoflor® 300 Cement with fine aggregate produces a smoother surface. Coverage: approximately 1.6m² per kg at 0.3mm thickness — up to 24m² per 15KG bucket.
Apply as a thin coat. Only mix what you can apply within 30 minutes.
| Ingredient | Amount (per 15KG bucket) | Small batch (per 1KG) |
|---|---|---|
| Clean water | 2 litres | ~140ml |
| Concrete Modifier | 2 litres | ~140ml |
| Liquid Colour Pigment | 200ml (1 container) | proportional |
| 300 Cement powder | 15KG | 1KG |
Mix and apply using the same method as Step 4. Apply thinly to limit visible surface imperfections and trowel lines.
Allow to dry — approximately 6–8 hours.
Repeat Step 5 (sand and re-prime) before proceeding to the finish coat.
Finish coat — Micro Cement
Ecoflor® Micro Cement produces an ultra-smooth, polishable finish. Coverage: approximately 3m² per kg at 0.1mm thickness — up to 30m² per 10KG bucket.
Only mix what you can apply within 30 minutes.
| Ingredient | Amount (per 10KG bucket) | Small batch (per 1KG) |
|---|---|---|
| Clean water | 1.9 litres | ~190ml |
| Concrete Modifier | 1.9 litres | ~190ml |
| Liquid Colour Pigment | 200ml (1 container) | proportional |
| Micro Cement powder | 10KG | 1KG |
Apply with a steel trowel in a thin, tight coat. Ensure full coverage and avoid surface texture and build-up at edges and corners.
Colour mixing tip: Add the full 200ml pigment container to the entire liquid batch and stir until evenly combined. Then measure out the required volume of coloured liquid proportionate to the cement powder being mixed — e.g. 760ml per 2KG of Micro Cement.
Allow to dry — approximately 4–6 hours.
Important: Do not add liquid to rehydrate a stiffening mix — this will alter the colour. Remix with the paddle stirrer to soften it.
Prepare for sealing
Remove all masking tape. Use a steel spatula to knock down any dry cement build-up along edges and corners.
Sand the entire surface with 100–120 grit sandpaper. Keep sanding minimal at this stage — over-sanding will polish the surface and reveal excessive colour movement.
Vacuum all dust and debris thoroughly before sealing.
A higher grit sandpaper (e.g. 180+) can be used for a more polished appearance, though this is not generally recommended as a standard finish.
Seal
Sealing protects the surface, aids curing, and provides stain and abrasion resistance. Apply sealer no earlier than 8 hours after completing the Micro Cement coat.
Follow the product Technical Data Sheet for each sealer. For external or wet areas, add EcoGrip to the final coat of sealer for slip resistance.
Protect the finished surface from rain and potential damage until fully sealed and cured for 7 days.
Ready to get started? Our floor covering kits include everything you need for spaces from 15m² to 100m².
Shop floor kits Get expert advice